How to properly collect a milk sample for microbiological analysis
Proper sampling is the foundation of reliable mastitis diagnosis. Even minor contamination of a sample can distort microbiological findings and subsequent treatment decisions.
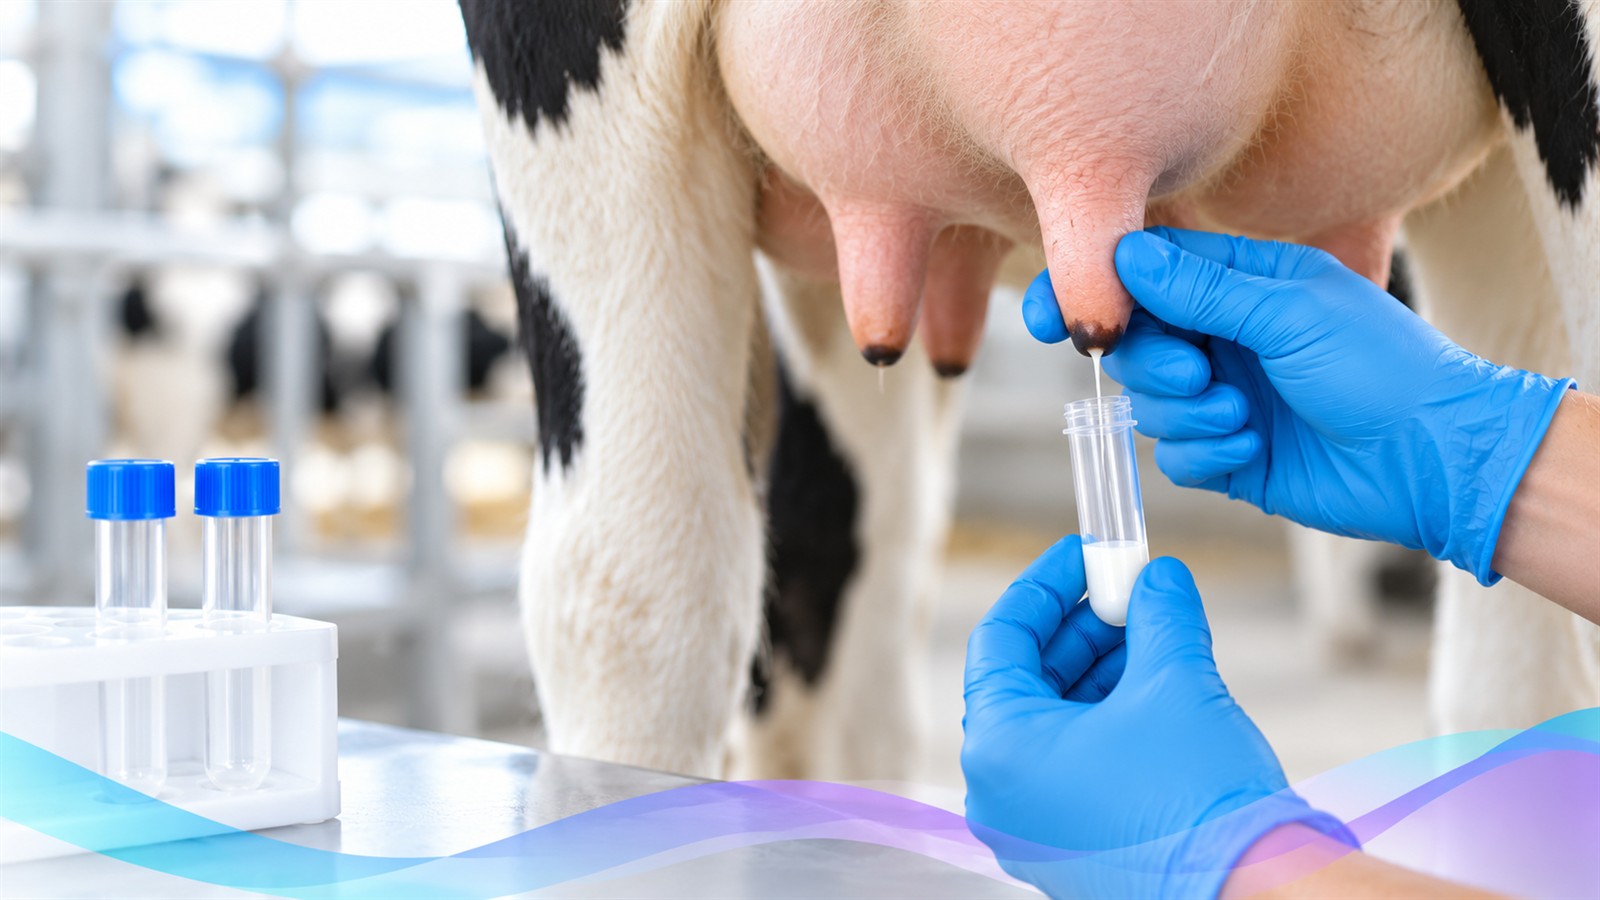
Microbiological testing of milk helps identify the pathogen causing mastitis and select an appropriate treatment approach. For the result to be truly reliable, however, everything must start with proper sample collection. Even a minor handling error can cause contamination and lead to an incorrect interpretation.
We have therefore prepared a simple, practical guide to collecting a milk sample from a dairy cow correctly, storing it and avoiding the most common mistakes.
Why is proper milk sample collection so important?
When testing milk microbiologically, we look for microorganisms that may cause inflammation of the mammary gland – mastitis. However, bacteria are also commonly found on teat surfaces, udder skin, workers’ hands and in the barn environment.
If these microorganisms enter the sample during collection, they can affect the culture result. A contaminated sample can cause:
- A false-positive result or a result that is difficult to interpret.
- Incorrect identification of the likely mastitis pathogen.
- Unnecessary repeat testing.
- An inappropriate treatment approach and potentially unnecessary antibiotic use.
Aseptic collection is essential: a procedure that minimises the risk of introducing unwanted microorganisms into the sample.
When should a milk sample be collected for microbiological testing?
Microbiological testing is particularly useful when clinical or subclinical mastitis is suspected, as well as in cases of recurring udder health problems.
- Clinical mastitis: flakes, clots, changes in milk colour or consistency, or swelling of the affected quarter.
- Subclinical mastitis: an elevated somatic cell count (SCC), or a positive CMT/NK test result.
- Recurrent mastitis: inflammation recurs or the treatment used so far is not sufficiently effective.
- Before selective dry cow therapy: assessment of the infection status of the mammary gland as part of deciding on the next steps.
The sample should be collected before antibiotic treatment begins, provided the animal’s clinical condition allows it. In severe mastitis accompanied by systemic signs, however, neither sampling nor waiting for the result must delay emergency veterinary care.
How to collect a milk sample correctly: an 8-step procedure
Sample collection itself takes only a few minutes. Thorough hygiene and following the steps in the correct order are essential.

Prepare the necessary equipment
Prepare a sterile sample tube, disposable gloves, clean towels, a pre-milking disinfectant, disinfectant swabs or wipes with 70% alcohol, and materials for labelling the sample. If you will not be processing the sample immediately, also prepare a cool box.
Important: Use only sterile sample containers intended for microbiological testing.

Label the sample tube
Before collecting the sample, label the tube with the cow number, udder quarter, date and, ideally, the collection time. Correct identification is essential, particularly when testing a larger number of animals or repeatedly monitoring an individual dairy cow.

Clean the teat and discard the first streams of milk
Remove visible dirt from the teat and clean and dry it as needed. Then discard approximately the first 4–5 streams of milk, ideally into a strip cup with a dark base. This removes some of the milk from the teat canal and also allows you to visually check for flakes, clots or other changes.
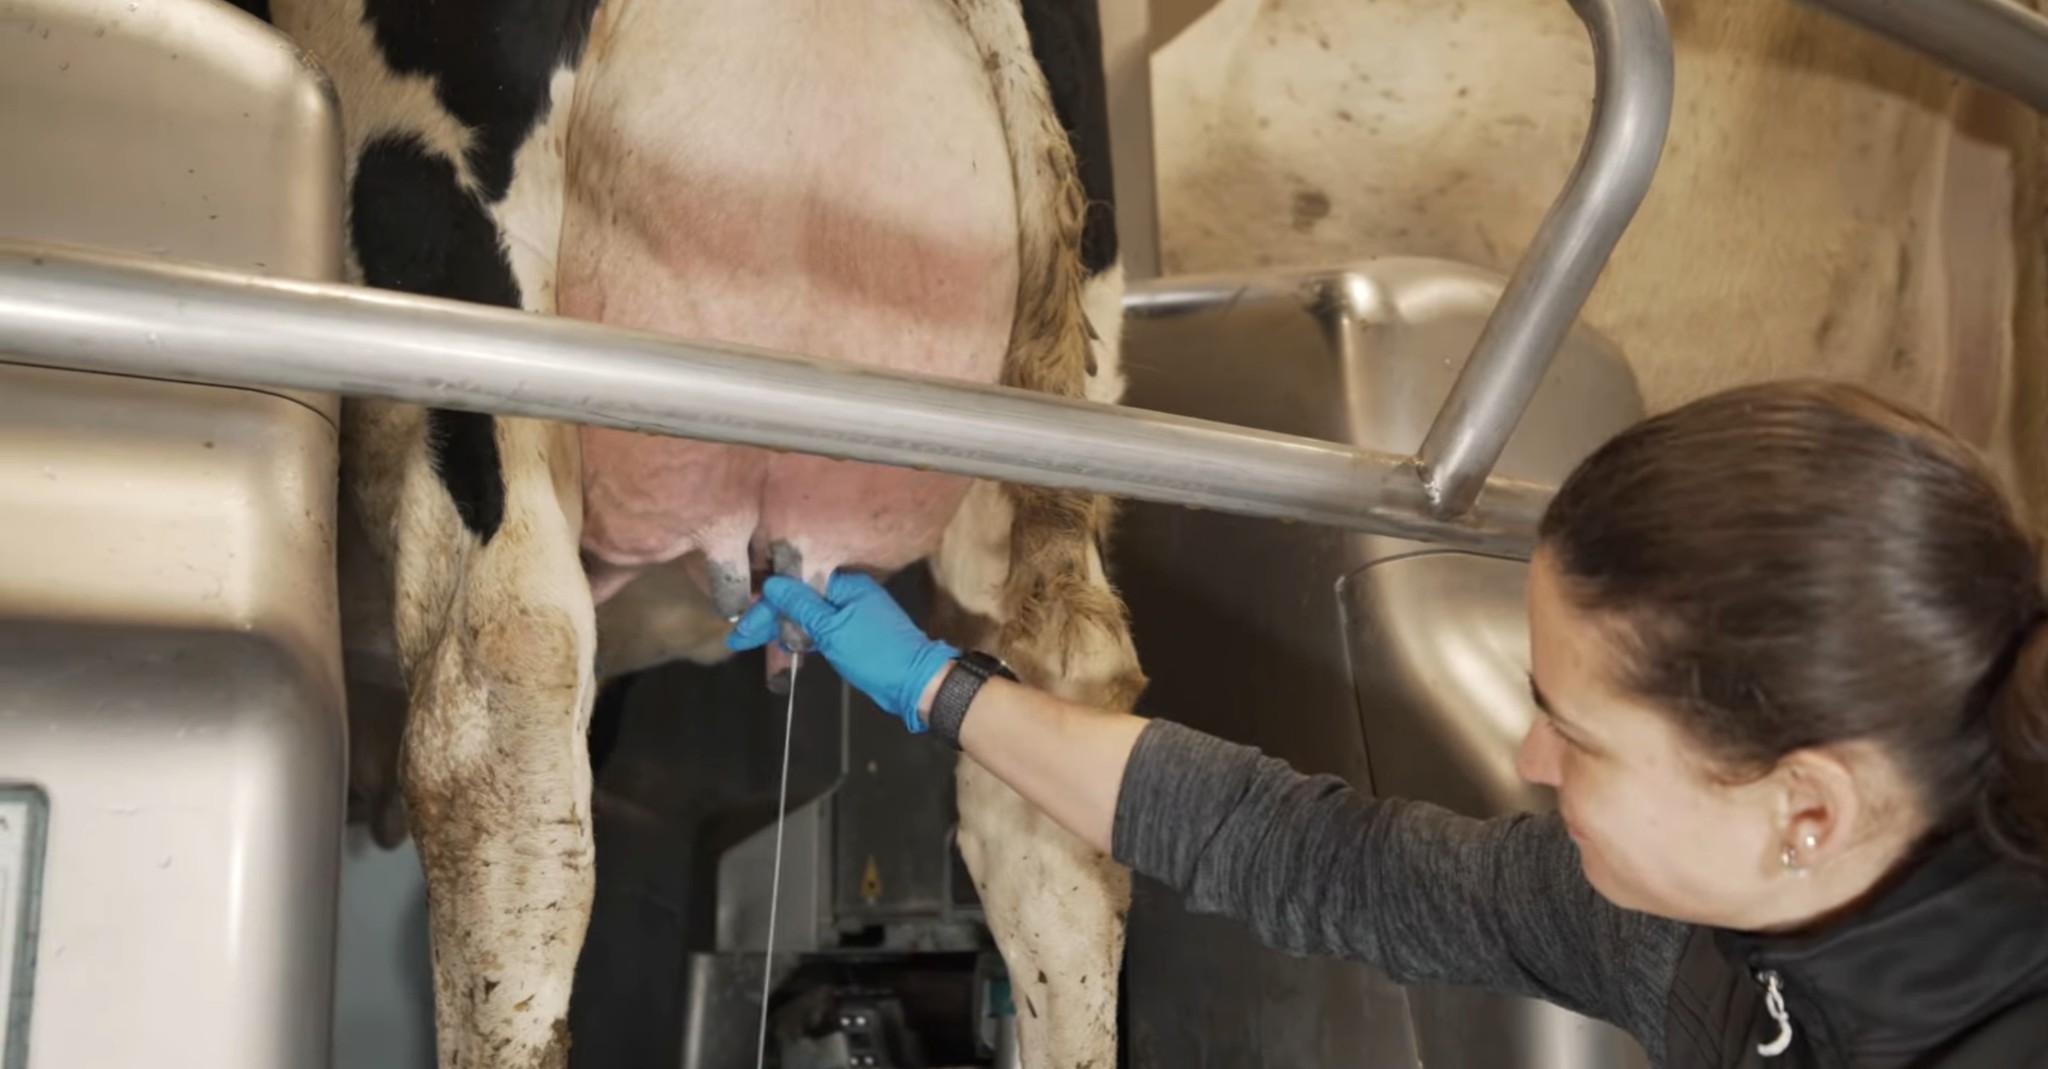
PHOTO 1 | Discarding the first streams of milk before sample collection.

Perform pre-milking disinfection and dry thoroughly
Use a suitable disinfectant intended for treating teats before milking. Observe the contact time specified by the manufacturer, then dry the teat thoroughly with a clean individual towel.

Disinfect the teat canal opening
This step is particularly important for microbiological testing. Using a disposable disinfectant wipe or a separate swab moistened with 70% alcohol, thoroughly wipe the teat end and the teat canal opening in particular. Repeat with a fresh swab until it remains clean after wiping.
After disinfection, do not touch the teat end with your hands or any other objects. When collecting samples from several quarters, disinfect the teats furthest away first, followed by those closest to you.
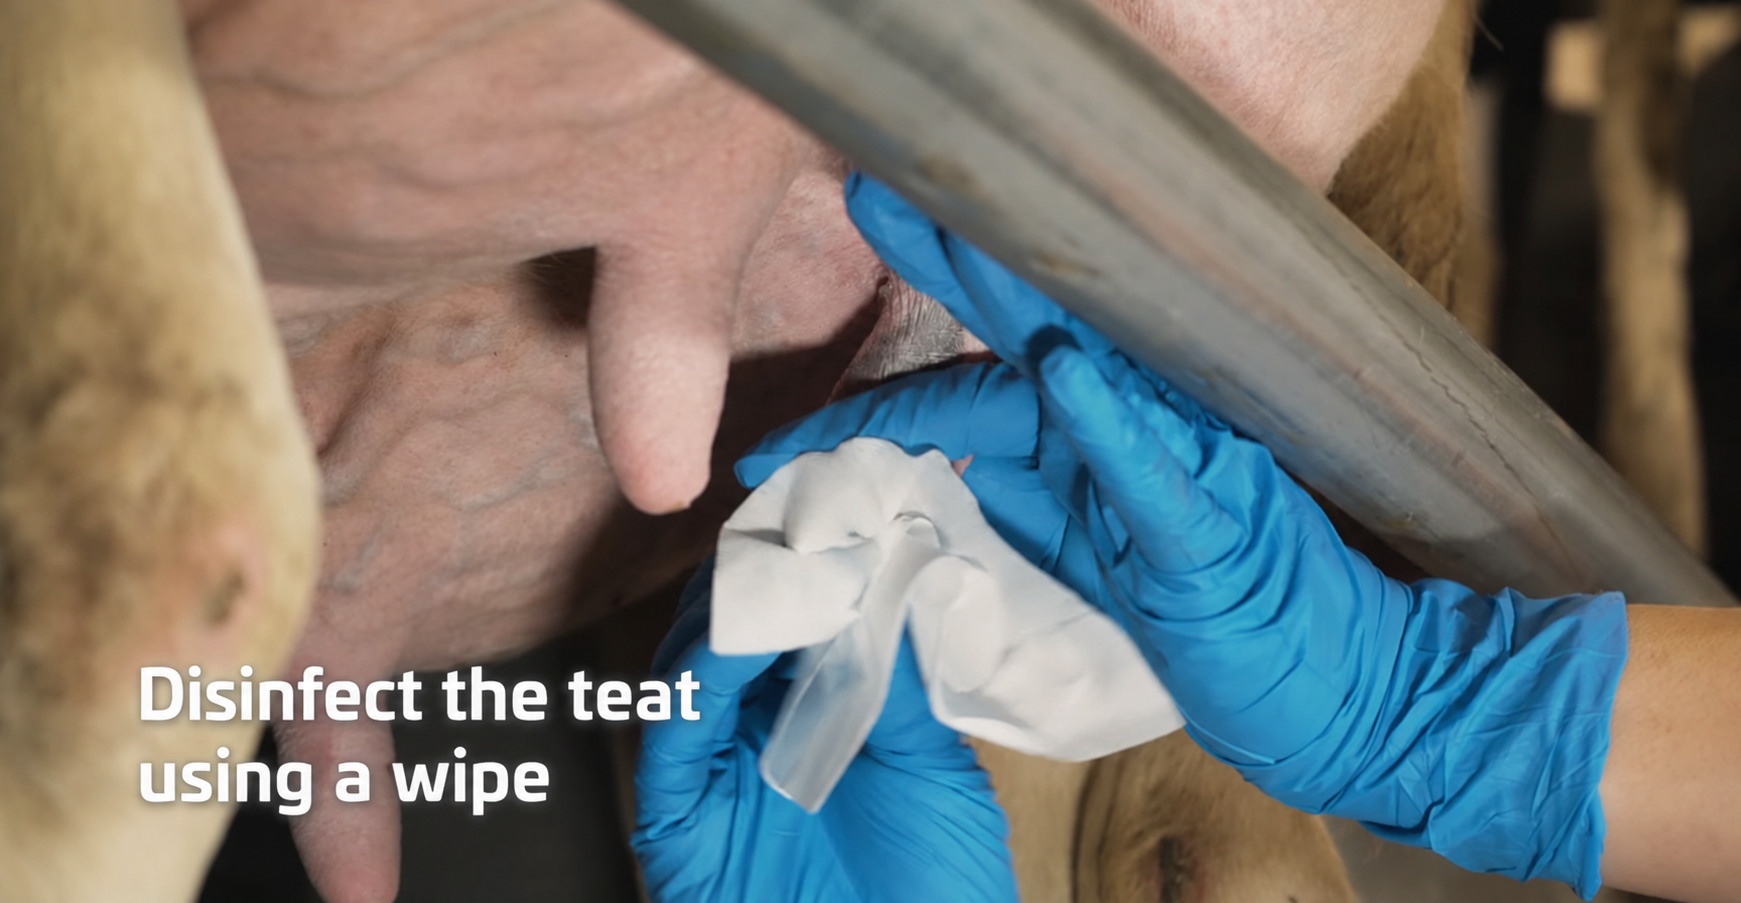
PHOTO 2 | Disinfecting the teat canal opening with a disposable disinfectant wipe.

Collect milk into a disposable sterile tube
Open the sterile tube immediately before collection and follow these guidelines:
- Do not touch the inside of the cap or the mouth of the tube.
- Do not place the cap on surrounding surfaces.
- Hold the tube at a slight angle, approximately 45°.
- Prevent the mouth of the tube from touching the teat.
Approximately 5–10 ml of milk is generally sufficient for routine laboratory microbiological testing. However, always follow the requirements of the specific laboratory or diagnostic system. Close the tube tightly immediately after collection.
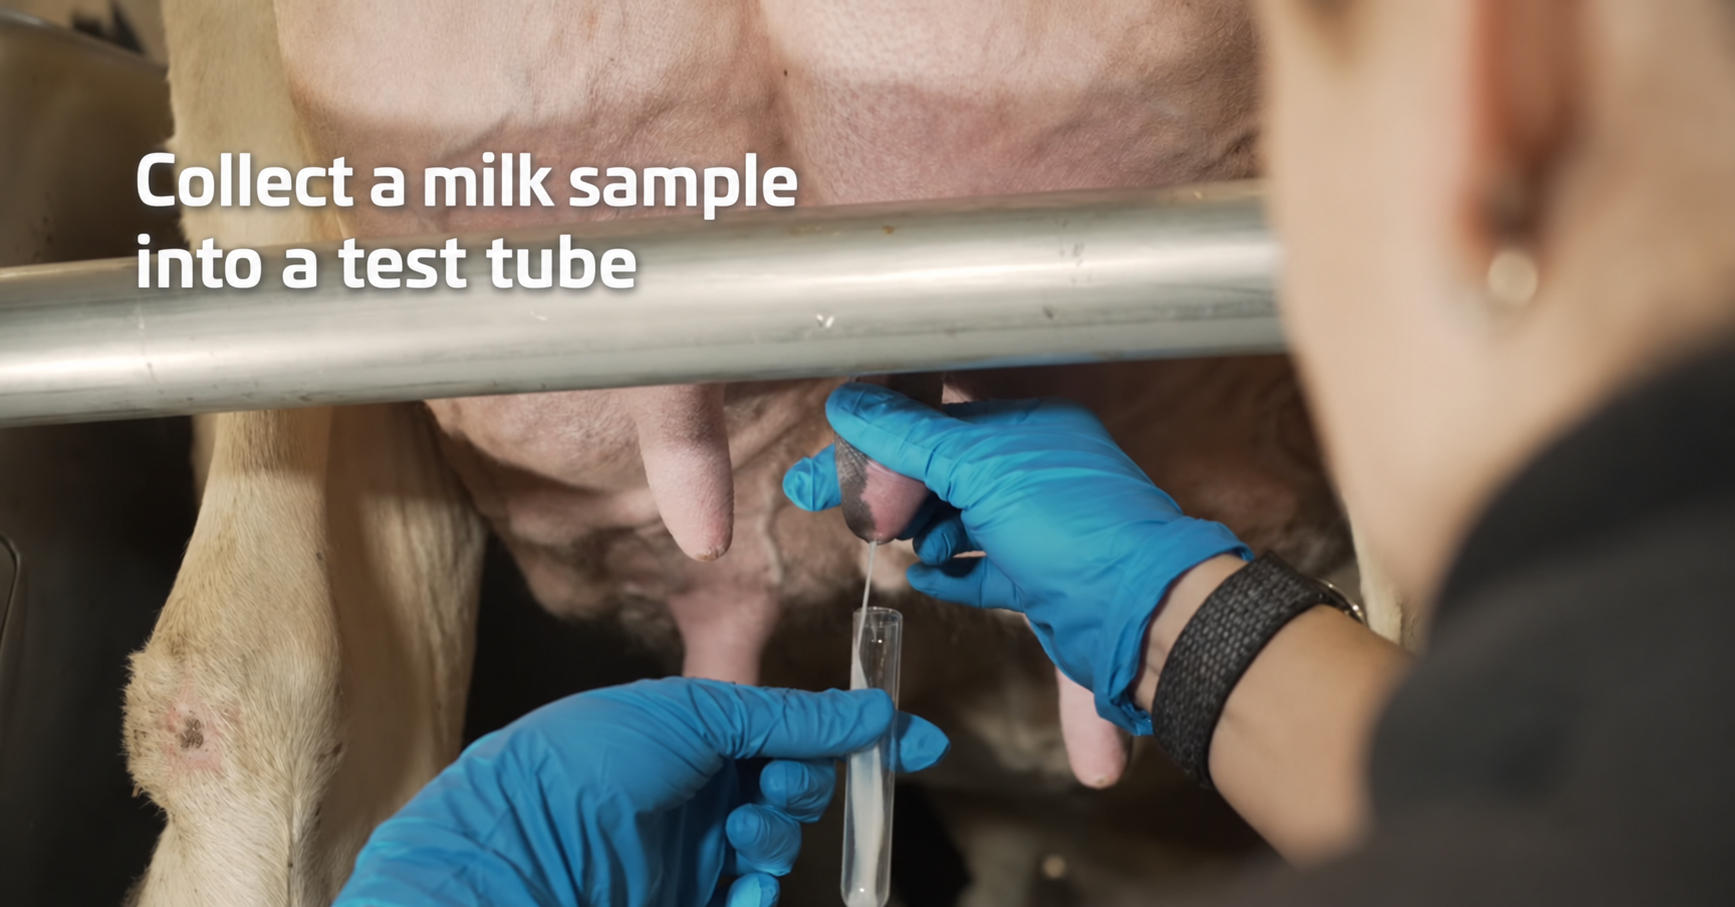
PHOTO 3 | Aseptic milk collection into a disposable sterile tube.

Follow a systematic approach when sampling several quarters
If you are collecting samples from several udder quarters, begin the actual collection with the teats closest to you and continue towards those furthest away. To diagnose a particular affected quarter, it is generally preferable to collect samples from each quarter separately. A composite sample can make it harder to identify the site of infection and interpret the findings.

Store the sample correctly or process it immediately
If the sample will be sent to a laboratory, refrigerate it immediately after collection, ideally at around 4 °C. Deliver it as soon as possible, preferably within 24 hours, unless the laboratory specifies otherwise. For longer storage, freezing may be suitable in some cases – always follow the instructions of the relevant laboratory and the planned testing method.
ClearMilk on-farm diagnostics: A freshly collected sample can be processed directly on the farm according to the test instructions.
Download the guide to proper milk sample collection
Download the guideThe seven most common mistakes when collecting a milk sample
1. Inadequate disinfection of the teat end. Washing alone is not enough. Thorough cleaning and disinfection of the teat canal opening are essential.
2. Allowing the mouth of the tube to touch the teat. Contact can transfer microorganisms from the teat surface into the sample.
3. Reusing the same wipe. Use a separate disposable wipe or swab for each teat.
4. Incorrect sample storage. Leaving the sample at room temperature can alter the proportions of microorganisms present.
5. Collecting the sample only after antibiotic treatment has begun. Treatment can reduce the number of viable bacteria and affect the culture findings.
6. Using the same gloves for several cows. Change or disinfect gloves between cows.
7. Labelling the tube only after collection. Risk of sample mix-ups
2. Allowing the mouth of the tube to touch the teat. Contact can transfer microorganisms from the teat surface into the sample.
3. Reusing the same wipe. Use a separate disposable wipe or swab for each teat.
4. Incorrect sample storage. Leaving the sample at room temperature can alter the proportions of microorganisms present.
5. Collecting the sample only after antibiotic treatment has begun. Treatment can reduce the number of viable bacteria and affect the culture findings.
6. Using the same gloves for several cows. Change or disinfect gloves between cows.
7. Labelling the tube only after collection. Risk of sample mix-ups
Following the correct procedure is not just a matter of hygiene – it directly affects the diagnostic value of the test.
What happens to the sample after collection?
A correctly collected sample can be tested in a microbiology laboratory or directly on the farm using a suitable diagnostic system. Laboratory culture enables the detection and identification of microorganisms. Where indicated, this can be followed by antibiotic susceptibility testing of the isolated bacteria, known as an antibiogram.
An alternative for rapid preliminary decision-making on the farm is the ClearMilk test, which uses a three-sector Petri dish with special chromogenic culture media. After inoculation and incubation, information on the presence and likely species of selected mastitis pathogens can generally be obtained within 22–24 hours.
The result helps the farmer and veterinarian decide on the next steps and whether antibiotic treatment may be needed. However, a negative culture result does not always rule out infection. The presence of several different microorganisms may also indicate contamination and require repeat sampling.
Frequently asked questions (FAQ)
For routine microbiological testing, 5–10 ml of milk is usually sufficient. The exact amount depends on the method used and the laboratory’s requirements.
If you need to identify the pathogen causing infection in a specific quarter, separate sampling is preferable. Composite samples can be used for some screening procedures, but their interpretation is more difficult.
For routine culture testing, the sample should be processed or delivered to the laboratory as soon as possible, ideally within 24 hours at around 4 °C. For longer storage, follow the laboratory’s instructions.
Yes, but treatment may affect the result. Whenever possible, collect the sample before the first antibiotic dose. In severe cases, however, sampling must not delay emergency treatment.
Proper sampling, more reliable diagnostics and more targeted treatment
Microbiological milk testing is one of the fundamental tools of modern mastitis management. Its value, however, depends not only on the diagnostic method used but also on the quality of the sample itself.
Thorough sampling hygiene, correct identification and appropriate storage are essential prerequisites for a reliable result.
With ClearMilk on-farm diagnostics, you can obtain important information about the likely mastitis pathogen as early as the following day and, together with your veterinarian, decide on the next steps based on specific diagnostic results.
Want to diagnose mastitis directly on the farm?
Try the ClearMilk test – a practical tool for rapid microbiological diagnosis of mastitis in dairy cows.
ORDER CM TESTTechnical references
- National Mastitis Council: Procedures for Collecting Milk Samples.
- University of Wisconsin–Madison, Veterinary Diagnostic Laboratory: Milk Sample Collection Guidelines.
- Cornell University, Quality Milk Production Services: Submission Guidance.
